Articles about Raspberry Pi 3

A Raspberry Pi 3 is one of the things that you should consider getting if you are a computer programmer.

There are currently two versions of Raspberry Pi 3:

  1. Raspberry Pi 3 Model B
  2. Raspberry Pi 3 Model B+

Raspberry Pi 3 B and 3 B+ side by side

Both versions of Raspberry Pi 3 are single board computers that comes with WiFi and Bluetooth inbuilt. They are small and powerful enough for serving many of our computer needs at home.

On this page, you will find articles related to Raspberry Pi 3. Popular topics include building your own Raspberry Pi 3 reverse proxy server, building a Raspberry Pi 3 CCTV, setting up Raspbian Stretch Lite on Raspberry Pi 3 for running Python applications and more.

Why get a Raspberry Pi?

If you are in the computer technology industry, then you most probably have heard about the Raspberry Pi.

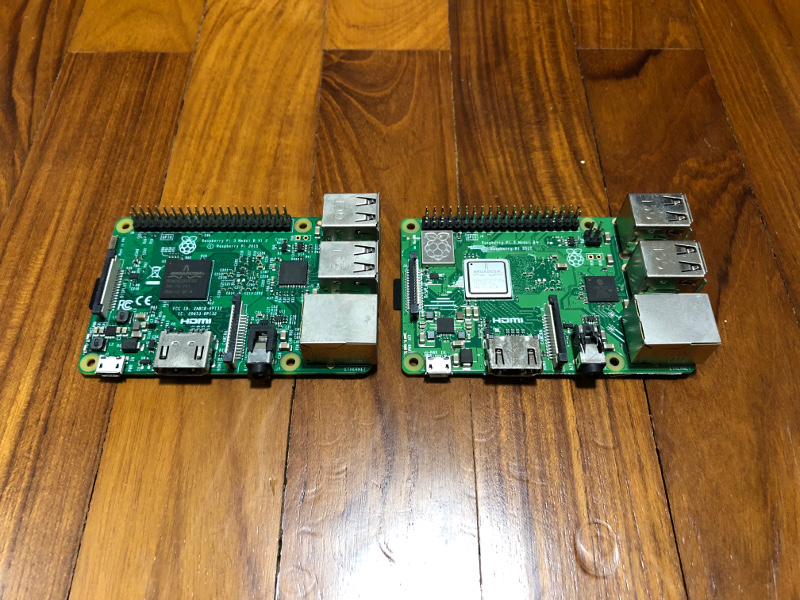
When a Raspberry Pi was first launched in 2012, there were limited USD 35 alternatives for Raspberry Pi. Therefore, buying a Raspberry Pi is a no-brainer to get started with Internet of things (IoT) projects. A Raspberry Pi would be an affordable ticket to the world of IoT.

However, as newer single board computers get into the market, it becomes harder to make a buying decision. Especially if you habitually practice delay gratification, you may face quite a bit of procrastination in getting a Raspberry Pi.

So why should you get a Raspberry Pi?

In case you are deciding whether to buy a Raspberry Pi, here are some reasons for you to get one.

How to setup a Raspberry Pi security camera for home surveillance with Raspbian Buster Lite and motionEye

Even though a Raspberry Pi security camera is not the cheapest surveillance camera, it can be worthwhile building one.

Especially for Raspberry Pi fans, you may have several unused Raspberry Pis because you buy one for each release. In such a case, a big part of your Raspberry Pi security camera is sunken cost.

Given that, let’s look at how we can setup a Raspberry Pi security camera with Raspbian Buster Lite and motionEye.

Cool your Raspberry Pi 4 with the ICE Tower CPU Cooling Fan

As I had mentioned in why my computer restarted itself when I play League of Legends, excess heat can cause a computer to behave abnormally.

So how will your Raspberry Pi 4 Model B deal with rising heat? In case there is a spike in operating temperature, Raspberry Pi 4 will slow your CPU down significantly. When that happens, you will not be able to enjoy 4K videos on your Raspberry Pi 4 anymore.

After I did a review on the Raspberry Pi 4, I had been contemplating whether to get a cooler fan for my Raspberry Pi 4. In the midst of delayed gratification, Seeed Studio asked if I am willing to do a review on their Ice Tower Cooler. Since I wanted a cooling fan for my Pi 4, I agreed to have a look at the Ice Tower Cooler.

Given that, this post contains some points for your reference if you are pondering whether to get the ICE Tower CPU Cooling Fan for to cool your Raspberry Pi 4.

How to setup Raspbian Stretch on Raspberry Pi 3 for developing Python 3 applications

Previously, I had shared:

Although Raspbian Stretch Lite is ideal for running Python 3 applications on Raspberry Pis, it is not so handy for developing Python 3 applications.

For example, if you are building a Python application that interfaces with the GPIO ports and CSI camera of your Raspberry Pi 3, it is hard to test it out on Raspbian Stretch Lite.

Since Raspbian Stretch includes a desktop environment, it is more convenient for developing Python 3 applications for Raspberry Pi. With this purpose in mind, this is how to setup Raspbian Stretch on Raspberry Pi 3 for developing Python 3 applications.

How to host a static website on your Raspberry Pi 3 with Raspbian Stretch Lite and Nginx

When you want to host a static website as your personal portfolio, you can consider using a Raspberry Pi 3. In addition to having a small form factor, a Raspberry Pi 3 is a single board computer that does not take up too much energy to run 24-7.

In order to host a static website on Raspberry Pi 3, you will need an operating system and a web server. Given these points, this is how to host a static website on your Raspberry Pi 3 with Raspbian Stretch Lite as the operating system and Nginx as the web server.

How I use my Raspberry Pis to help me work on with my side projects

Undeniably, Raspberry Pi has revolutionised the way we use computing technology in our lives. In addition to being energy efficient, a Raspberry Pi is a single board computer that does not take up too much space.

Given these points, a Raspberry Pi is an ideal programmer gift and one of the things that you should buy if you are a computer programmer.

On the other hand, pursuing side projects help me explore technologies that I may not be able to explore at work. For example, through Techcoil, I got to know more about:

In case you are wondering how to use Raspberry Pis to help you work on your side projects, read on to find out more.

Helpful GPIO Pinout resources that you can reference while connecting sensors to your Raspberry Pi 3

Undeniably, the GPIO (general-purpose input/output) pins along the top edge of your Raspberry Pi 3 board is what makes it so useful for IOT projects. In case you are curious, this is how the GPIO pins looks like on a Raspberry Pi 3 B+:

GPIO pins of a Raspberry Pi 3 B+

Although there is the word GPIO on the circuit board that indicates what those pins are, there is no indication on what each individual pin does.

So how do you know which pins to connect your sensors to? Thankfully, there are several good resources that you can reference while connecting sensors to your Raspberry Pi 3 board.

In case you need it, here are some helpful GPIO resources that you can reference when you are connecting sensors to your Raspberry Pi 3 board.

How to read temperature and humidity from a DHT11 sensor that is connected to a Raspberry Pi 3

I had always wanted to measure the temperature and humidity of the environment where my herbs are grown at.

Since I had a few pieces of Raspberry Pi 3 lying around the house, I decided to use one of them to measure the temperature and humidity of the area of the house where my herbs are.

An additional sensor is required to measure the temperature and humidity of the environment. Therefore, I went to AliExpress and got a DHT11 sensor. By connecting a DHT11 sensor to my Raspberry Pi 3, I can give it the ability to read the temperature and humidity of its environment.

Given these points, I created this post to show how to read temperature and humidity from a DHT11 sensor that is connected to a Raspberry Pi 3.

In order for us to check the temperature and humidity from the DHT11 sensor, we will build a simple Flask application that returns the temperature and humidity values as HTTP responses to HTTP clients.

Building a Raspberry Pi 3 prototype camera that takes a picture at the press of a button

A fun way to test your Raspberry Pi Camera on your Raspberry Pi 3 is to build a prototype that takes a picture at the press of a button. Through such an activity, we will be able to experience:

  • connecting a button to the GPIO ports on a Raspberry Pi.
  • setting up a camera through the CSI interface of a Raspberry Pi.
  • preparing an operating system, such as Raspbian Stretch Lite , for running Raspberry Pi projects.
  • coding a Python 3 script that interacts with the GPIO port and camera on a Raspberry Pi.
  • running a Python 3 script when Raspberry Pi powers on.

Given these points, this post shows how you can build a Raspberry Pi 3 prototype camera that takes a picture at the press of a button.