How to use NSSM to setup Jupyter Notebook as a Windows Service running its own Python 3 virtual environment
When you take Andrew Ng's Deep Learning Coursera course, you can get a better understanding of deep learning. In addition, you will get many Jupyter Notebook documents that you can reference while building models that can solve interesting problems.
When you want to readily access those documents, you can setup Jupyter Notebook as a Windows Service on your Windows machine.
As I had mentioned in how to use NSSM to run a Python 3 application as a Windows Service in its own Python 3 virtual environment, NSSM is a very helpful tool for us to create Windows Services.
Since we can install Jupyter Notebook via pip, we can run Jupyter Notebook from its own virtual environment. In addition to that, since we can create a Python 3 virtual environment in Windows 10, we can setup Jupyter Notebook as a Windows Service running its own Python 3 virtual environment.
Given these points, let us look at how we can use NSSM to setup Jupyter Notebook as a Windows Service running its own Python 3 virtual environment.
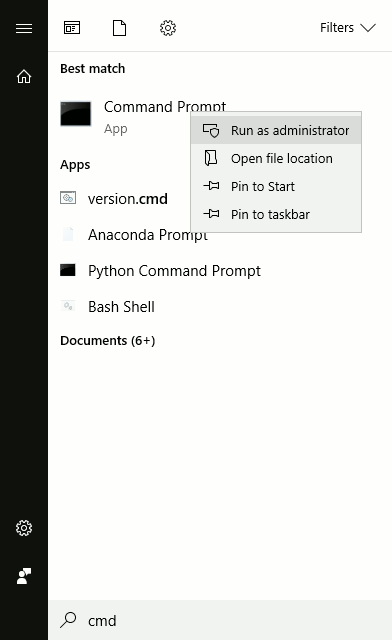
Run a command prompt instance as administrator
In order to avoid being prompted for administrator access while using NSSM, let's run a command prompt instance as administrator.

We will run the subsequent commands in this command prompt instance.
Preparing the virtual environment to run your Jupyter Notebook instance
Before continuing on, be sure to go through the tutorial on how to create a Python 3 virtual environment in Windows 10. After you had gone through the tutorial, you would have installed Python 3 on your Windows machine. In addition to that, you will understand how to create, activate and install dependencies into a virtual environment.
Creating the virtual environment to run our Python 3 application
Given these points, let us first create the virtual environment to run your Jupyter Notebook instance. In order to do so, start a command prompt window and type in the following command:
python -m venv "%systemdrive%%homepath%\Documents\jupyter-notebook-env"
After the command completes, you will find the Python 3 virtual environment within the %systemdrive%%homepath%\Documents\jupyter-notebook-env folder.
Installing Jupyter Notebook into the Python 3 virtual environment on Windows
After you had created the Python 3 virtual environment to run your Jupyter Notebook instance, run the following command to activate it:
"%systemdrive%%homepath%\Documents\jupyter-notebook-env\Scripts\activate.bat"
After you had activated your Python 3 virtual environment, you can install Jupyter Notebook with the following command:
pip install jupyter
When the command completes, you will be able to run an instance of Jupyter Notebook from your Python 3 virtual environment.
Creating a batch file to run Jupyter Notebook without starting a browser
At this point in time, we are ready to create a batch file to run Jupyter Notebook without starting a browser.
In order to do so, let's create a run_jupyter.bat file inside the %systemdrive%%homepath%\Documents\jupyter-notebook folder with the following content:
call ..\jupyter-notebook-env\Scripts\activate.bat
call jupyter notebook --ip 0.0.0.0 --port 12345 --no-browser
Downloading a copy of NSSM
After you had created the windows batch file to run the an instance of Jupyter Notebook within the virtual environment, proceed to download NSSM. Save the .zip file and extract its content. After extracting the content, you will find a nssm.exe file inside the win32 and win64 folder.
Depending on whether your Windows is 32 bit or 64 bit, you will use the corresponding nssm.exe file to install your Jupyter Notebook as a Windows Service.
For the purpose of this tutorial, let's assume that we want to use the nssm.exe in the C:\nssm-2.24\win64 folder.
Installing your Jupyter Notebook as a Windows Service with nssm.exe
Given that our nssm.exe is located in C:\nssm-2.24\win64, we can then use the following command to install our Python application as a Windows Service:
C:\nssm-2.24\win64\nssm install jupyter-notebook "%systemdrive%%homepath%\Documents\jupyter-notebook\run_jupyter.bat"
When you run the command, NSSM will install your Jupyter Notebook as a Windows Service.
At this point in time, your Windows Service is not yet started.
Enabling log files for your Jupyter Notebook
When you start your Windows Service at this point in time, it will not generate any log files when it runs. In such a situation, you will not be able to access Jupyter Notebook as we need to provide a token that Jupyter Notebook generates in standard error.
Therefore, let's configure it to channel application output to log files.
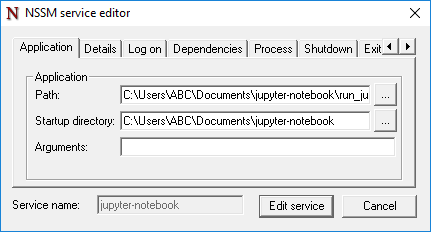
In order to do so, first start NSSM service editor with the following command:
C:\nssm-2.24\win64\nssm edit jupyter-notebook
After the command run, NSSM service editor will appear for enabling log files for your Jupyter Notebook.

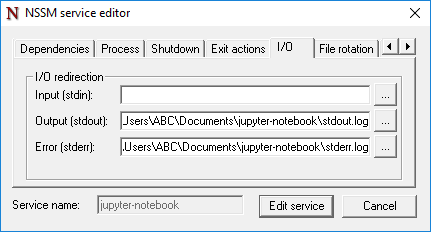
Given that, click on the I/O tab and enter the paths that you want the log files to appear:

Once you are done with that, click Edit service.
Starting your Python application as a Windows Service
In order to start the Windows Service for your Jupyter Notebook, run the following command:
C:\nssm-2.24\win64\nssm start jupyter-notebook
Since Startup Type for the Windows Service is set to Automatic, our Jupyter Notebook will run automatically when we had started our Windows machine.
Accessing Jupyter Notebook for the first time
In order to access Jupyter Notebook for the first time, we need to check the token that is captured in the logs. Therefore, go to the stderr.log file that you had specified earlier. Once you open the log file, you should see output similar to the following:
[I 22:16:40.777 NotebookApp] Serving notebooks from local directory: C:\Users\ABC\Documents\jupyter-notebook
[I 22:16:40.777 NotebookApp] The Jupyter Notebook is running at:
[I 22:16:40.777 NotebookApp] http://(DESKTOP-ABCDEF or 127.0.0.1):12345/?token=cca2b43a954dbccbcf264b6bbaba31339769e8a21e98f3b4
[I 22:16:40.777 NotebookApp] Use Control-C to stop this server and shut down all kernels (twice to skip confirmation).
[C 22:16:40.798 NotebookApp]

    To access the notebook, open this file in a browser:
        file:///C:/WINDOWS/system32/config/systemprofile/AppData/Roaming/jupyter/runtime/nbserver-12932-open.html
    Or copy and paste one of these URLs:
        http://(DESKTOP-4SA4PFO or 127.0.0.1):12345/?token=cca2b43a954dbccbcf264b6bbaba31339769e8a21e98f3b4
Given that, follow one of the instructions to access your Jupyter Notebook for the first time. In this case, I will open up a browser and enter http://localhost:12345/?token=cca2b43a954dbccbcf264b6bbaba31339769e8a21e98f3b4 into the location bar.

With that, you will be able to readily access your Jupyter Notebook documents whenever you need to.