How to host a static website on your Raspberry Pi with Nginx running on Raspbian Buster Lite
After you had understood HTML, CSS and JavaScript from The Web Developer Bootcamp, you can start to host a static website on an actual web server.
If you had been the kind of fan who buy newly-launched Raspberry Pis, then you may find some lying around the house collecting dust.
In this situation, why not use one of your Raspberry Pi to host something that you had just learnt?
Given that, let's look at how you can host a static website on your Raspberry Pi with Nginx running on Raspbian Buster Lite.
Recommended hardware list
In case you ask, we recommend using at least a Raspberry Pi 2B and later as the board. If you do not have a Raspberry Pi yet, you may want to consider getting the following items:
- CanaKit Raspberry Pi 4 Basic Kit 4GB
- SanDisk 128GB Extreme microSDXC UHS-I Memory Card with Adapter
- ZkeeShop Magnetic Installation Acrylic Case for Raspberry Pi 4 Model B
- Gigabit Ethernet Cable (If you want to connect your Pi to an Ethernet network)
Setup Raspbian Buster Lite on your Raspberry Pi
Once you had gathered you Raspberry Pi hardware, proceed to setup Raspbian Buster Lite for Raspberry Pi server projects.
When you had done so, you would have setup the SSH connection to your Raspberry Pi. Given that, this tutorial will assume that you have a terminal window with an active SSH connection to your Raspberry Pi.
In case you had not done so, start a terminal window and SSH into your Raspberry Pi. If your Raspberry Pi had 192.168.1.114 as its IP address, you will then enter the following command to SSH into your Raspberry Pi:
ssh pi@192.168.1.114
After you had entered the password that you had set (or raspberry if you did not change the default password), you will be able to configure your Raspberry Pi.
Install Nginx server on your Raspberry Pi
Once you had logged into your Raspberry Pi, install Nginx server with the following command:
sudo apt-get update
sudo apt install nginx -y
When the commands had been executed successfully, enter the following command to check your Nginx installation:
systemctl status nginx.service
If your Nginx had been installed properly, then you should see output similar to the following:
● nginx.service - A high performance web server and a reverse proxy server
   Loaded: loaded (/lib/systemd/system/nginx.service; enabled; vendor preset: enabled)
   Active: active (running) since Tue 2019-09-24 23:52:46 +08; 2min 23s ago
     Docs: man:nginx(8)
  Process: 520 ExecStartPre=/usr/sbin/nginx -t -q -g daemon on; master_process on; (code=exited, status=0/SUCCESS)
  Process: 579 ExecStart=/usr/sbin/nginx -g daemon on; master_process on; (code=exited, status=0/SUCCESS)
 Main PID: 580 (nginx)
    Tasks: 5 (limit: 4915)
   Memory: 9.8M
   CGroup: /system.slice/nginx.service
           ├─580 nginx: master process /usr/sbin/nginx -g daemon on; master_process on;
           ├─581 nginx: worker process
           ├─582 nginx: worker process
           ├─583 nginx: worker process
           └─584 nginx: worker process

Sep 24 23:52:45 raspberrypi systemd[1]: Starting A high performance web server and a reverse proxy server...
Sep 24 23:52:46 raspberrypi systemd[1]: Started A high performance web server and a reverse proxy server.
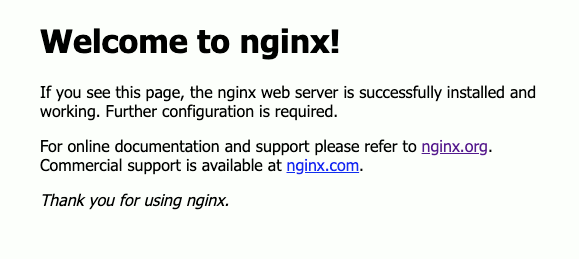
In addition to that, when you use your browser to access http://<your_pi_ip_address>/, you should see the following screen. For example, I will see this the following screen if I enter http://192.168.1.114 into my browser's location bar:

How to serve your static website regardless of which IP address or domain name is used to access your Nginx server on your Raspberry Pi
As I had mentioned in, understanding the default configuration of Nginx, what you had seen earlier is the effect of the Nginx default configurations.
Since the Nginx installation includes a Virtual Host configuration that handles HTTP requests directed to any IP address and domain name in the Location header, we can simply replace the contents in /var/www/html/ directory with the static contents of our website. When we do so, we will have completed our objective of hosting a static website with our Raspberry Pi.
Hosting a sample resume as a static website on your Raspberry Pi
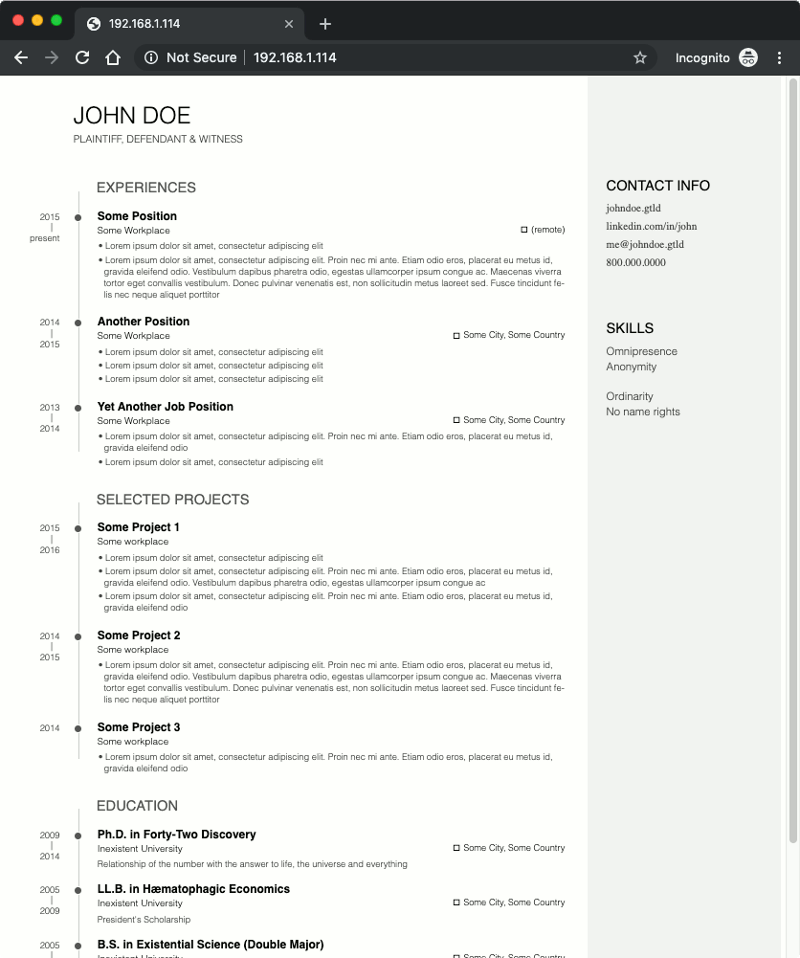
For example, I can simply dump the contents of html-resume onto the /var/www/html/ directory, I will be able access that static website with http://192.168.1.114/resume.html. If you want that resume to appear when the browser hits http://192.168.1.114, simply change resume.html to index.html.
In case you need it, these are the commands that you can run on your Raspberry Pi to host a sample resume as a static website:
cd /var/www
sudo wget https://github.com/mnjul/html-resume/archive/master.zip
sudo unzip master.zip
sudo cp -r html-resume-master/* html
sudo rm master.zip
sudo rm -r html-resume-master
sudo mv html/resume.html html/index.html
When you access http://192.168.1.114 this time, you should see the following screen:

How to host multiple static websites with your Raspberry Pi's Nginx
So what if you want to host multiple static websites with your Raspberry Pi?
Prerequisites for hosting websites from home with your Raspberry Pi
As I had mentioned in how to host multiple websites from home, we can host multiple websites by allocating a domain name to each website.
At the domain registrar, we will map the domain name to the public IP address that our home router gets from our Internet service provider.
In addition to that, we will configure our home router to map port 80 (and 443) of the public address to the private address of our Raspberry Pi. For example, this is how you can configure a Linksys router to map port 80 and 443 of the public address to the private address of a web server.
How does a HTTP server differentiates between HTTP requests directed at different host
Whenever a browser accesses a HTTP server, the host portion of the URL is included inside the Location header of the HTTP request that is sent to the server.
For example, for http://www.techcoil.com/about, the host portion is www.techcoil.com. Similarly, for http://192.168.1.114/resume.html, the host portion is 192.168.1.114.
When the HTTP server receives a HTTP request, it will look at the Location header to know which domain the HTTP request is designated for.
In the case of Nginx, it will then check through its Virtual Host configurations to determine how to handle that request.
Configuring Nginx to differentiate each static website by domain names
Given these points, we can configure Nginx to serve files for multiple static websites by creating a Virtual Host entry for each domain.
In order to do so:
- Create a separate directory to contain the static content of each website.
- Create a separate Nginx configuration file for each website.
Creating a separate directory to contain the static content of each website
We can create a separate directory to contain the static content of each website by running the mkdir command on our Raspbian Buster Lite. For example, if my domain name is anewdomainname.com, I will run the following command to create a directory to contain the static contents:
sudo mkdir /var/www/anewdomainname.com
Be sure to replace anewdomainname.com with your own domain name.
Creating a separate Nginx configuration file for each website
Once we had created the directory to contain the static contents of a website, we then create a Nginx configuration file inside /etc/nginx/sites-enabled directory.
Given that, we first use nano to create the configuration file:
sudo nano /etc/nginx/sites-enabled/anewdomainname.com.conf
Once nano loads, we can then copy the Nginx configurations into the editor:
server {
    server_name anewdomainname.com;
    listen 80;
    root /var/www/anewdomainname.com;
    index index.html;
}
After you had replaced anewdomainname.com with your domain, press Ctrl-X, Enter and Y to save the changes.
Getting Nginx to take in your static website configurations
Once you had created the configurations and directories for your static websites, you can first test the configurations with the following command:
sudo nginx -t
When you see output similar to the following:
nginx: the configuration file /etc/nginx/nginx.conf syntax is ok
nginx: configuration file /etc/nginx/nginx.conf test is successful
you can then run the following command to restart your Nginx server:
sudo systemctl restart nginx.service
Once your Nginx server had restarted, you will be able to access your static websites via their domain names.
