How to create an API endpoint that generates a QR Code image, with Python 3 Flask-RESTPlus and python-qrcode
When you have an API endpoint that generates a QR Code image, another device with a QR Code scanner will be able to get the encoded value to perform some action. For example, WhatsApp web generates a QR Code image that encodes a code for WhatsApp app to sign in the user.
So how can you create an API endpoint that generates a QR Code image? With this in mind, let's look at how we can do so with Python 3 Flask-RESTPlus and python-qrcode.
Specifying the Python 3 dependencies for creating an API endpoint that generates a QR Code image
First, let's proceed with installing the Python 3 dependencies for creating an API endpoint that generates a QR Code image into your Python 3 environment. In order to do so, create a requirements.txt file with the following content:
flask-restplus==0.12.1
Pillow==6.0.0
qrcode==6.1
As shown above, we will need a href="https://flask-restplus.readthedocs.io/en/stable/" rel="noopener" target="_blank">flask-restplus, Pillow and qrcode for creating an API endpoint that generates a QR Code image.
Creating the Python 3 code for creating an API endpoint that generates a QR Code image
In order to keep things simple, let's create the Python 3 codes as a single source file and name it as run_app.py:
from flask import Flask, Blueprint, request, send_file
from flask_restplus import Api, Namespace, Resource, fields
from io import BytesIO

import os, qrcode

# Create Flask app
app = Flask(__name__)

# Associate Api with Blueprint
api_blueprint = Blueprint('API', __name__)
api = Api(api_blueprint,
    title='Api for QR code app',
    version='1.0',
    description='This is an API for QR code app',
    # All API metadatas
)

# Create namespace for containing Qr Code related operations
qrcode_namespace = Namespace('QrCode', description='Qr code related operations')
# Specify uri of qrcode namespace as /qrcode
api.add_namespace(qrcode_namespace, path='/qrcode')
# Specify uri of api blueprint as /api
app.register_blueprint(api_blueprint, url_prefix='/api')

# Define input model
qrcode_creation_input = qrcode_namespace.model('QRCode creation Input', {
    'value': fields.String(required=True, description='The value that is supposed to be encoded into qrcode'),
})


# Define API endpoint for creating Qr Code image
@qrcode_namespace.route('/')
@qrcode_namespace.doc('Creates a QRCode image based on a string value.')
class QrCodeRoot(Resource):

    @qrcode_namespace.expect(qrcode_creation_input)
    @qrcode_namespace.produces(['image/png'])
    @qrcode_namespace.response(200, description='Return QR Code png image file.')
    @qrcode_namespace.response(400, description='Invalid input provided.')
    def post(self):

        # Get value to encode into QR Code
        json_input = request.get_json()
        value_to_turn_into_qrcode = json_input['value']

        # Create qr code image and return it as HTTP response
        pil_img = qrcode.make(value_to_turn_into_qrcode)
        img_io = BytesIO()
        pil_img.save(img_io, 'PNG')
        img_io.seek(0)
        return send_file(img_io, mimetype='image/png')


if __name__ == '__main__':
    port = int(os.getenv("PORT", "5678"))
    app.run(host='0.0.0.0', port=port)
Understanding the Python 3 code for creating an API endpoint that generates a QR Code image
In case you are wondering what the previous Python 3 code does, this section explains the code by parts.
Importing the necessary dependencies for creating an API endpoint that generates a QR Code image
First, we import the necessary dependencies for creating an API endpoint that generates a QR code image:
from flask import Flask, Blueprint, request, send_file
from flask_restplus import Api, Namespace, Resource, fields
from io import BytesIO

import os, qrcode
Wiring flask_restplus with Flask to realise the uri for creating an API endpoint that generates a QR Code image
After we had imported the necessary dependencies, we then proceed to wire Flask Restplus with Flask to realise the url for creating an API endpoint that generates a QR Code image:
# Create Flask app
app = Flask(__name__)

# Associate Api with Blueprint
api_blueprint = Blueprint('API', __name__)
api = Api(api_blueprint,
    title='Api for QR code app',
    version='1.0',
    description='This is an API for QR code app',
    # All API metadatas
)

# Create namespace for containing Qr Code related operations
qrcode_namespace = Namespace('QrCode', description='Qr code related operations')
# Specify uri of qrcode namespace as /qrcode
api.add_namespace(qrcode_namespace, path='/qrcode')
# Specify uri of api blueprint as /api
app.register_blueprint(api_blueprint, url_prefix='/api')
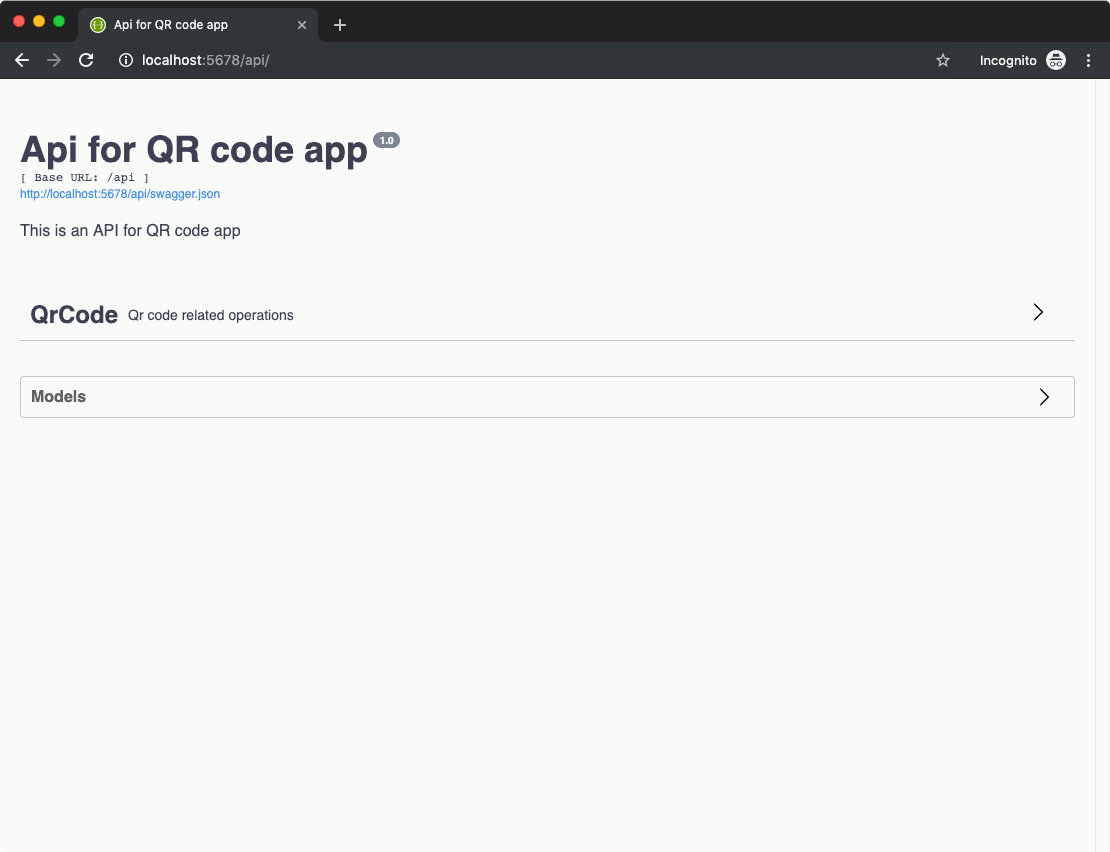
After the script ran the above codes, we will have a swagger documentation page available via /api. In addition to that, QR Code related API endpoints can be made available via /api/qrcode through the various decorator functions in qrcode_namespace.
Defining the expected input for the API endpoint that generates a QR Code image
Next, we then define the input model for the API endpoint that generates a QR Code image:
# Define input model
qrcode_creation_input = qrcode_namespace.model('QRCode creation Input', {
    'value': fields.String(required=True, description='The value that is supposed to be encoded into qrcode'),
})
Given that, we can then tell Flask RESTPlus to ensure that any HTTP request made to the API endpoint that generates a QR Code image adheres to the following JSON format:
{
  "value": "string to encode as QR code image"
}
Defining the API endpoint that generates a QR Code image
Given that we have the input model and namespace, we can then define the API endpoint that generates a QR Code image:
# Define API endpoint for creating Qr Code image
@qrcode_namespace.route('/')
@qrcode_namespace.doc('Creates a QRCode image based on a string value.')
class QrCodeRoot(Resource):

    @qrcode_namespace.expect(qrcode_creation_input)
    @qrcode_namespace.produces(['image/png'])
    @qrcode_namespace.response(200, description='Return QR Code png image file.')
    @qrcode_namespace.response(400, description='Invalid input provided.')
    def post(self):

        # Get value to encode into QR Code
        json_input = request.get_json()
        value_to_turn_into_qrcode = json_input['value']

        # Create qr code image and return it as HTTP response
        pil_img = qrcode.make(value_to_turn_into_qrcode)
        img_io = BytesIO()
        pil_img.save(img_io, 'PNG')
        img_io.seek(0)
        return send_file(img_io, mimetype='image/png')
In the above code, we defined a HTTP post request handler made to /api/qrcode. Inside the handler function, we first get the value to encode into QR code image.
After that, we use qrcode.make to get a Pillow instance that represents the encoded QR Code image. Given that, we then use an instance of BytesIO to hold the binary data of that QR Code image.
Once we have done so, we then use the send_file function to return the contents of that BytesIO instance as a HTTP response.
Running the Flask application with an API endpoint that generates a QR Code image
At the end of the script, we run the Flask application with the following code:
if __name__ == '__main__':
    port = int(os.getenv("PORT", "5678"))
    app.run(host='0.0.0.0', port=port)
The above code first check if the script is being run directly. If that is the case, it then checks if any port is provided as an environment variable named PORT. If no port is given, the port to run the Flask application is set to 5678.
Given that port number, we then run the Flask application.
Running example program
At this point in time, we will have created the following files:
- requirements.txt
- run_app.py
Let's look at how we can run the application.
Creating a virtual environment to run your Python application
Since virtual environments help us keep our Python applications in its own isolated environment, let's create one for this application.
Before we begin, let's assume that you are running your Python application in a Linux or Unix environment.
In case you are using Windows, refer to how to create a virtual environment for your Python 3 application in windows for more information.
With that in mind, let's run the following command to create a virtual environment for your Python 3 application with python3-venv in Linux or Unix in a shell terminal:
python3 -m venv qrcode-app-env
When the command completes, you will have a virtual environment in a directory named qrcode-app-env.
Installing the dependencies to run your Python application
Once you have created your virtual environment, proceed to activate it:
source qrcode-app-env/bin/activate
When your virtual environment is activated, run the following command to install your Python dependencies:
pip install -r requirements.txt
After you had installed the Python dependencies, proceed to run your application:
python run_app.py
Accessing the swagger documentation page for testing your QR code image generation API endpoint
Once your application is running, you can then use a browser to access http://localhost:5678/api:

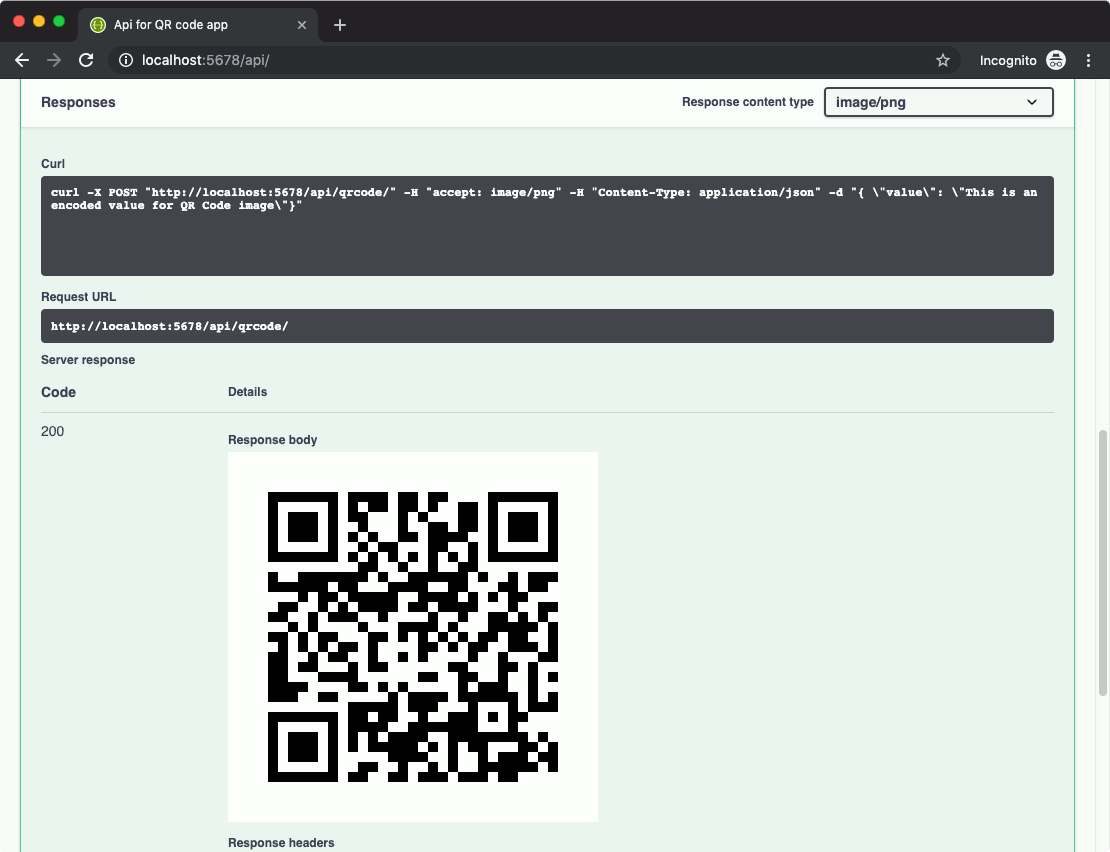
Given that, you can then try out the API endpoint in the API documentation page to get a QR Code image:

When you use a QR Code scanner to scan the QR Code image, you should get the following string value:
This is an encoded value for QR Code image